Introduction
I’ve been wanting a lightweight imagery tile server for a while. Last week I spent some time looking at the tile service providers that @Vincent Sarago built on top of his own tools rio-tiler, lambda-proxy. I went through several derived projects including lambda-tiler, landsat-tiler, rio-viz, etc. After some simple tests, I felt that the first two really need to rely on Lambda to achieve acceptable performance, and the third one uses Tornado as its app framework, which does consider concurrency, but it’s a single-machine application and “porting” it is quite a bit of work. I tried and then gave up. On a single node, the issue of request blocking is very serious; I tried a few combinations of apps and servers myself, with little improvement. Also, on a single node, this “re-read data on every request” model is not economical.
The simple options weren’t working out, so on the COG details page I noticed the Geotrellis project. The framework is implemented in Scala, and in the projects list I found an experimental project that was very close to my needs. I cloned it and tried to run it, but that failed — seems like the application entry point had changed. I was too lazy to go in and fix it (and didn’t know how), so I thought I’d just grab a small example from the quick start and spin up a tiles service; should be easy (yeah, right). The beginner experience for Scala in China is genuinely rough, even worse than Golang. The build tool sbt pulls files from Maven Central with turtle-like startup speed. I hunted down the few scarce posts on how to switch to domestic mirrors, wanted to puke 🤮 at one point, and only after switching to Huawei Cloud’s mirror did it become tolerable. Then there’s sbt.build’s bizarre syntax; I pushed through until I/O imagery, only to find that the latest API was completely different from the docs. I hacked around with the API, got stuck for more than ten minutes by the devilish implicit parameters, and then:
$ rm -rf repos/geotrellis-test ~/.sbt$ brew rmtree sbtI bailed.
Terracotta
Github’s feed is actually a great thing; it’s recommended a lot of useful stuff to me, including Terracotta (too hard to type, so I’ll just call it “the clay pot”). The official description:
Terracotta is a pure Python tile server that runs as a WSGI app on a dedicated webserver or as a serverless app on AWS Lambda. It is built on a modern Python 3.6 stack, powered by awesome open-source software such as Flask, Zappa, and Rasterio.
It supports both traditional deployment and Lambda, is lightweight, pure Python, and generally matches my preferences; the “tech stack” is also relatively modern.
Compared with lambda-tiler, which is likewise based on function computing, the clay pot is simpler in terms of structure and easier to understand. The entire flow of the latter is very straightforward: based on COG’s portion-request feature and GDAL’s VFS (Virtual File Systems), regardless of where your data is or how big it is, as long as you tell it the local path or HTTP URL, it can fetch tiles on the fly. In a Lambda environment, this approach doesn’t have major performance issues. But for use and deployment inside China, there are two problems:
- AWS has serious “acclimatization” issues in China, which makes using Lambda domestically problematic. Aliyun and other domestic vendors do provide function computing services, but they’re still not very mature, and porting
proxyand the rest is costly. - Some open-access datasets like Landsat 8, Sentinel-2 are hosted on S3 object storage. Using Lambda for tiling relies heavily on fast access across AWS components. If you provide services from inside China, access speed will be heavily impacted.
Of course, the clay pot is also recommended for deployment on Lambda functions. Indeed, that pattern is very suitable for dynamic tile services. But compared with lambda-tiler, it adds an easy-to-use, reliable “header cache mechanism”.
When using rio-tiler to implement a dynamic tile service that could be quickly deployed on a single machine and support a small number of users and low request volume, I had already thought about caching header information for data from a common source in memory. Because each tile request has to access the source data again to get the header, that’s very wasteful in a single-machine environment. I had considered building a dict keyed by data source path to store headers, or using a sqlite database; I tried the dict approach but the effect wasn’t obvious.
Terracotta, however, builds this into its business process by design, enforcing a preprocessing step when ingesting new data. Compared with processing directly, there’s a delay, but as the saying goes, “sharpening the axe won’t delay the chopping of firewood.” It’s still much faster than traditional pre-cut tiles.
In addition, Terracotta provides good API support for COG conversion, header injection, and other steps.
Quick Start
Trying it out is very simple. First switch to the environment you’re using, then:
$ pip install -U pip$ pip install terracottaCheck the version:
$ terracotta --version$ terracotta, version 0.5.3.dev20+gd3e3da1Go into the target directory where your .tif files are stored and optimize the imagery into COG format:
$ terracotta optimize-rasters *.tif -o optimized/Then ingest the imagery you want to serve into a sqlite database file using pattern matching.
I have to complain about this feature a bit. At first, I thought it used normal regex matching, but after messing with it for a while I realized it’s just simple {} matching, and you can’t not use matching. Annoying.
$ terracotta ingest optimized/LB8_{date}_{band}.tif -o test.sqliteAfter injecting into the database, start the service:
$ terracotta serve -d test.sqliteBy default the service starts on port 5000. There’s also a Web UI, which needs to be started separately in another session:
$ terracotta connect localhost:5000That also starts the Web UI. Then you can visit it at the prompted address.
Deployment
I didn’t look at Lambda deployment, since it’s roughly similar to lambda-tiler and AWS access from inside China is half-paralyzed. Porting to Aliyun or Tencent Cloud’s serverless would be too costly, so I gave up on that.
The traditional deployment method is as follows:
I deployed on a CentOS cloud host, which is mostly the same as in the docs.
First create an environment and install the software and dependencies:
$ conda create --name gunicorn$ source activate gunicorn$ pip install cython$ git clone https://github.com/DHI-GRAS/terracotta.git$ cd /path/to/terracotta$ pip install -e .$ pip install gunicornPrepare data; in this example, image files are in /mnt/data/rasters/:
$ terracotta optimize-rasters /mnt/data/rasters/*.tif -o /mnt/data/optimized-rasters$ terracotta ingest /mnt/data/optimized-rasters/{name}.tif -o /mnt/data/terracotta.sqliteCreate the service. I ran into two pitfalls here. The official example uses nginx reverse proxy to a sock file. I tried several methods, didn’t get it to work, and didn’t want to dig deeper.
server {    listen 80;    server_name VM_IP;
    location / {        include proxy_params;        proxy_pass http://unix:/mnt/data/terracotta.sock;    }}
The other issue: the application entry point version had changed; the one in service was inconsistent with the context. After modifying, it looked like this:
[Unit]Description=Gunicorn instance to serve TerracottaAfter=network.target
[Service]User=rootWorkingDirectory=/mnt/dataEnvironment="PATH=/root/.conda/envs/gunicorn/bin"Environment="TC_DRIVER_PATH=/mnt/data/terracotta.sqlite"ExecStart=/root/.conda/envs/gunicorn/bin/gunicorn \            --workers 3 --bind 0.0.0.0:5000  -m 007 terracotta.server.app:app
[Install]WantedBy=multi-user.target
Another detail: use 0.0.0.0 to allow external access.
The official explanation:
- Absolute path to Gunicorn executable
- Number of workers to spawn (2 * cores + 1 is recommended)
- Binding to a unix socket file
terracotta.sockin the working directory- Dotted path to the WSGI entry point, which consists of the path to the python module containing the main Flask app and the app object:
terracotta.server.app:app
In the service, you need to specify the Gunicorn executable path, set the number of workers, bind the socket file, and specify the app entry point.
Enable autostart and start the service:
$ sudo systemctl start terracotta$ sudo systemctl enable terracotta$ sudo systemctl restart terracottaNow you can see the service’s description:
$ curl localhost:5000/swagger.json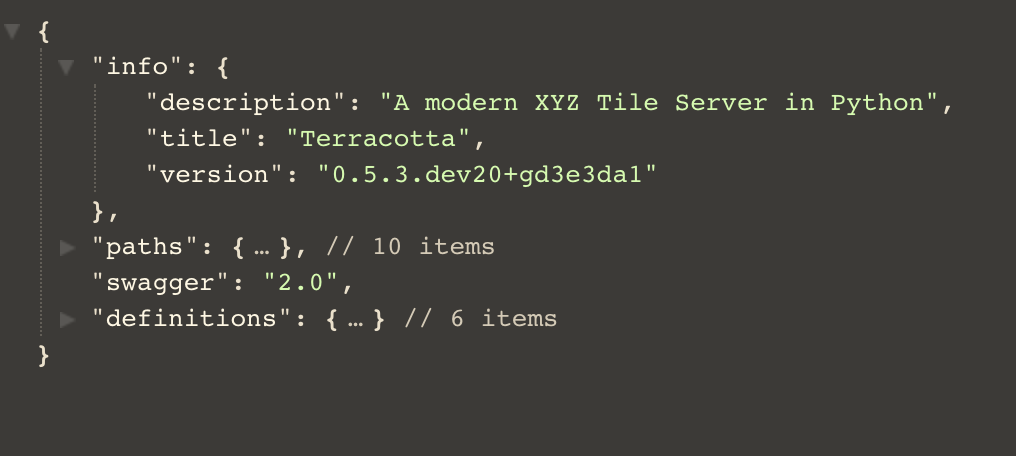
Of course, you can also use Terracotta’s built-in client to see the result:
$ terracotta connect localhost:5000Workflow
As for the choice of header storage, sqlite is certainly more convenient, but MySQL is more flexible and stable, and online data can be injected remotely.
I ran into a problem here: the driver’s create method failed to create the schema, and I couldn’t see what was wrong. So I pulled the table definitions from the driver and created the required tables manually:
from typing import Tuple
import terracotta as tcimport pymysql

# driver = tc.get_driver("mysql://root:password@ip-address:3306/tilesbox'")key_names = ('type', 'date', 'band')keys_desc = {'type': 'type', 'date': 'data\'s date', 'band': 'raster band'}
_MAX_PRIMARY_KEY_LENGTH = 767 // 4  # Max key length for MySQL is at least 767B_METADATA_COLUMNS: Tuple[Tuple[str, ...], ...] = (    ('bounds_north', 'REAL'),    ('bounds_east', 'REAL'),    ('bounds_south', 'REAL'),    ('bounds_west', 'REAL'),    ('convex_hull', 'LONGTEXT'),    ('valid_percentage', 'REAL'),    ('min', 'REAL'),    ('max', 'REAL'),    ('mean', 'REAL'),    ('stdev', 'REAL'),    ('percentiles', 'BLOB'),    ('metadata', 'LONGTEXT'))_CHARSET: str = 'utf8mb4'key_size = _MAX_PRIMARY_KEY_LENGTH // len(key_names)key_type = f'VARCHAR({key_size})'
with pymysql.connect(host='ip-address', user='root',                     password='password', port=3306,                     binary_prefix=True, charset='utf8mb4', db='tilesbox') as cursor:    cursor.execute(f'CREATE TABLE terracotta (version VARCHAR(255)) '                   f'CHARACTER SET {_CHARSET}')
    cursor.execute('INSERT INTO terracotta VALUES (%s)', [str('0.5.2')])
    cursor.execute(f'CREATE TABLE key_names (key_name {key_type}, '                   f'description VARCHAR(8000)) CHARACTER SET {_CHARSET}')    key_rows = [(key, keys_desc[key]) for key in key_names]    cursor.executemany('INSERT INTO key_names VALUES (%s, %s)', key_rows)
    key_string = ', '.join([f'{key} {key_type}' for key in key_names])    cursor.execute(f'CREATE TABLE datasets ({key_string}, filepath VARCHAR(8000), '                   f'PRIMARY KEY({", ".join(key_names)})) CHARACTER SET {_CHARSET}')
    column_string = ', '.join(f'{col} {col_type}' for col, col_type                              in _METADATA_COLUMNS)    cursor.execute(f'CREATE TABLE metadata ({key_string}, {column_string}, '                   f'PRIMARY KEY ({", ".join(key_names)})) CHARACTER SET {_CHARSET}')
Terracotta’s header storage requires four tables in total:
| Table | Describe |
|---|---|
| terracotta | Stores Terracotta version info |
| metadata | Stores data headers |
| Key_names | Key types and descriptions |
| Datasets | Data paths and (key) attribute info |
Modify the service startup config as follows:
[Unit]Description=Gunicorn instance to serve TerracottaAfter=network.target
[Service]User=rootWorkingDirectory=/mnt/dataEnvironment="PATH=/root/.conda/envs/gunicorn/bin"Environment="TC_DRIVER_PATH=root:password@ip-address:3306/tilesbox"Environment="TC_DRIVER_PROVIDER=mysql"
ExecStart=/root/.conda/envs/gunicorn/bin/gunicorn \            --workers 3 --bind 0.0.0.0:5000  -m 007 terracotta.server.app:app
[Install]WantedBy=multi-user.target
For injecting local files, refer to the following method:
import osimport terracotta as tcfrom terracotta.scripts import optimize_rasters, click_typesimport pathlib
driver = tc.get_driver("/path/to/data/google/tc.sqlite")print(driver.get_datasets())
local = "/path/to/data/google/Origin.tiff"outdir = "/path/to/data/google/cog"filename = os.path.basename(os.path.splitext(local)[0])seq = [[pathlib.Path(local)]]path = pathlib.Path(outdir)# Call a click methodoptimize_rasters.optimize_rasters.callback(raster_files=seq, output_folder=path, overwrite=True)
outfile = outdir + os.sep + filename + ".tif"
driver.insert(filepath=outfile, keys={'nomask': 'yes'})
print(driver.get_datasets())
Run output:
Optimizing rasters:   0%|          | [00:00<?, file=Origin.tiff]
Reading:   0%|          | 0/992Reading:  12%|█▎        | 124/992Reading:  21%|██▏       | 211/992Reading:  29%|██▉       | 292/992Reading:  37%|███▋      | 370/992Reading:  46%|████▌     | 452/992Reading:  54%|█████▍    | 534/992Reading:  62%|██████▏   | 612/992Reading:  70%|██████▉   | 693/992Reading:  78%|███████▊  | 771/992Reading:  87%|████████▋ | 867/992
Creating overviews:   0%|          | 0/1
Compressing:   0%|          | 0/1Optimizing rasters: 100%|██████████| [00:06<00:00, file=Origin.tiff]{('nomask',): '/path/to/data/google/nomask.tif', ('yes',): '/path/to/data/google/cog/Origin.tif'}
Process finished with exit code 0
With minor modifications to pass in the input filename and output folder name, you can implement an imagery optimization and ingestion workflow.